Introduction: Linux command line
Most research computing resources use Linux as the operating system. Although Linux does have a GUI similar to Windows and Mac OS X, more often than not you will be working at a command line interface which is text-based. The tutorials provided here are meant to provide a very basic introduction to working with Linux via the command line. More in-depth tutorials/explanations for topics and commands beyond those given here can be found on-line.
You will may not be able to runn commands you might find beyond those given in the tutorials here because some of them require administrator privileges.
When you login into a server (likely using SSH) you will see something like the following:
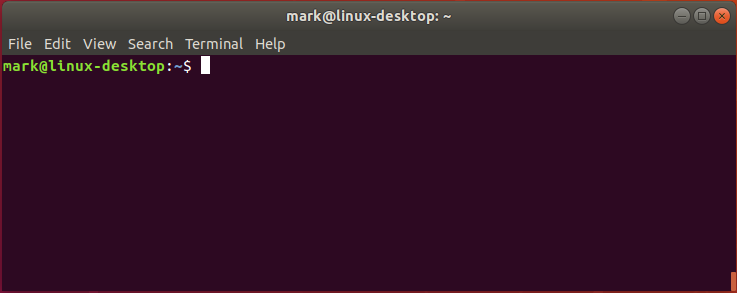
The text mark@linux-desktop:~$ is known as the command line prompt (or more simply the prompt) where you type your commands. In the remainder of this section of the tutorial we introduce some basic commands and tips. In other sections of this multi-part tutorial we provide more details about working with files and directories which are critical to becoming comfortable working without a GUI. The last section on tmux…something about tmux
Logging off
When you are done The first command to know is exit. This logs you off (disconnects) from the server.
Logging off also stops any software you might be running. This will not be an issue on the cluster as long as you have submitted your software to run through Slurm (i.e., sbatch).
On other resources, we recommend using tmux see introduction to tmux if you need to log off a server but need to keep software running (e.g., because it take a long time to run).
I ran a command and nothing seems to be happening
A second command to remember is Ctrl+c. Every once in a while you may run a program and it may appear that nothing is happening other than the cursor is blinking but not at a prompt. If this situation persists for a long time (several minutes or more) it may be that your program is stuck and not actually working. If you press the Ctrl+c key combination it should stop your program, returning you to a prompt. Sometimes you have to use this command two or three times in order to stop your program.
Editing files
Linux comes with several different programs to edit files from the command line. Here we will briefly present one of them, nano, which is on most Linux systems by default. nano with no other arguments will open a blank file. You can also open an existing file or create a new file with a specific filename by providing the name of the file after nano. For example, nano myfile.txt. If the file is in another directory (or you want it in another directory in the case of a new file) you can specify the file by its path (e.g., nano /home/auser/proj1/dataset1.txt) if you don't want to cd to that directory before editing.
nano and for that matter most Linux file editors have no default extension (i.e. .txt). Youmust include that as part of the filename when you create/save the file if you want a specific file extension
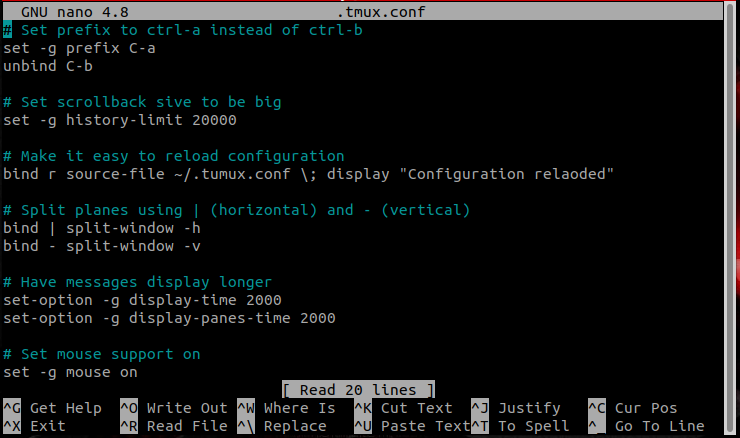
Below shows the nano editor. While editing files is pretty straightforward with nano, there are a few things to clarify.
- Common commands are given along the bottom of the screen and a more comprehensive list can be accessed via help.
- The use of
^in the commands equates to theCtrlkey. For example,^Xwould be the keystrokesCtrl+X - The use of
M-equates to theAltkey. For exampleM-Uto undo would be the keystrokesAlt+U - Even though the commands are presented using capital letters, you do not need to use a captial letter.
- The use of
- Some command names are unclear as to what they do.
- Write Out
^Osaves the file. If you exit and the file has been modified but not saved,nanowill ask if you wish to save the file. - Read File
^Ropens a file - Where Is
^Wsearches the file for some text
- Write Out
- Sometimes it may be helpful to show line numbers while editing a file. This can be done using
Alt+Shift+3. If line numbers are displayed and you wish to hide them, you would use the same keystroke combination.
For a slightly more in-depth introduction to nano, you might look through this tutorial, although you should ignore the section describing how to install nano.
Monitoring CPU/Memory usage
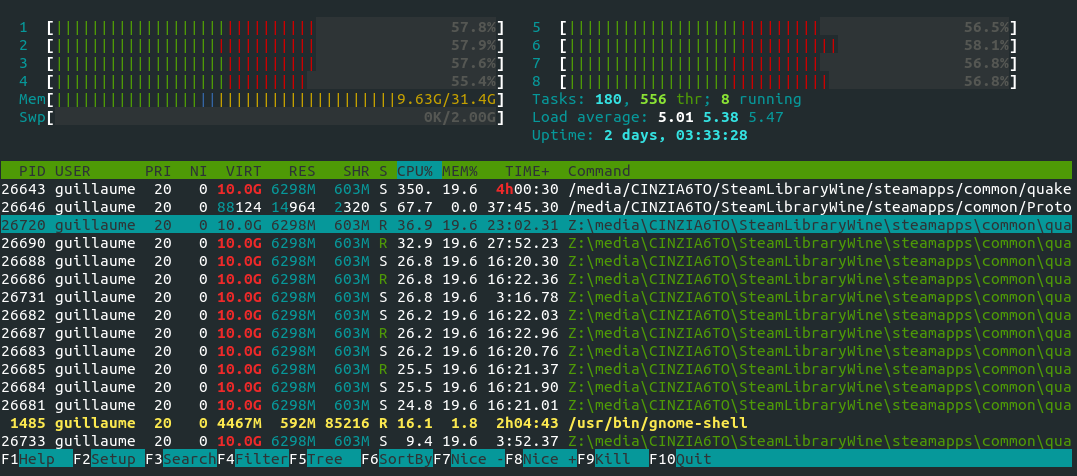
The final command introduced in this section is htop This command produces a display similar to the one below and provides a lot of information about the processes running on the system. You can close the htop display by pressing q.
Before explaining more about htop and it's usefulness, there is one caveat. You can run htop on the cluster, however it will not be useful because it only provides information on rcs-scsn.fandm.edu which is the server you log into to submit your compute jobs. The jobs themselves run on different servers so you won't be able to use htop to see what is going on with them.
While htop displays a lot of information about processes running on a computer system, there are two important things you should focus on
- Information about CPUs (at the very top)
- The number of CPUS (usually numbered 1 to n)
- CPU usage
- Information about memory (Just under the CPUs labelled Mem)
- The amount of memory available on the system
- The amount of memory being used
For example, in the htop output pictured above we can see
- There are 8 CPUs
- All CPUs are doing some sort of processing (indicated by the width of the green band) and each CPU has about 60% utilization
- There is 32GB of memory on the system
- Currently about 9.5 GB of memory is being used
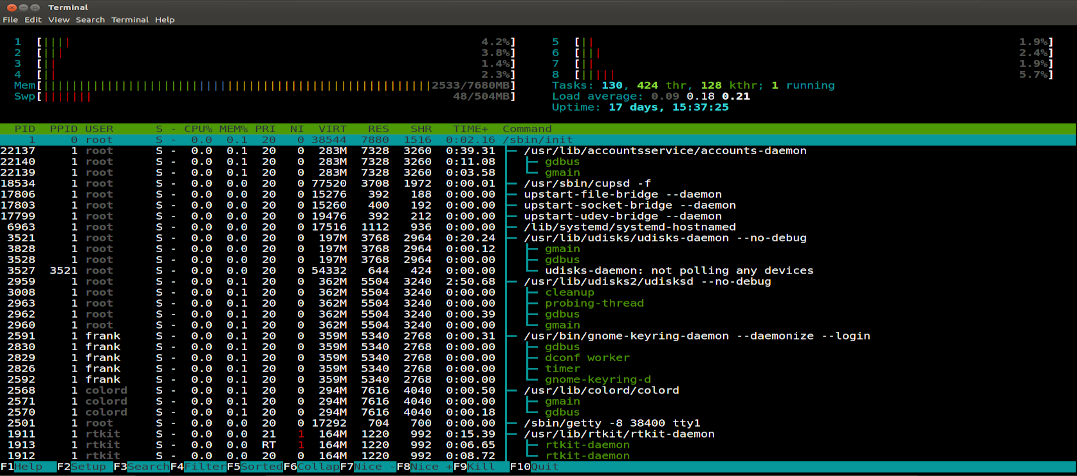
Or consider the htop display below:
- Once again there are 8 CPUs
- The CPUs are doing very little processing
- There is 8GB of memory on the system
- Currently about 2GB of memory is being used
You can use htop to your advantage in two key ways:
- To see if your program requires a lot of CPU resources, memory resources, or both
- Does the system you are trying to run on have those resources?
- When running code on the cluster, the info from htop can help you make decisions regarding resources (e.g., CPUs) to request when submitting a job
- If you want to run some code on a system but you see that system is already very busy with other programs, you can try a different system
Taking advantage of command history
Linux keeps a history of commands you use in a file. This is history is extensive but may not be exahustive in the sense that usually only the last 500 to 1000 commands you have executed will be stored in history.
You can view your command history (it displays from oldest command to most recent command) using history. If you have a large history, many of the commands will scroll past you before you can see them. To prevent this you can use history | more which will cause the output to pause until you press space. Each line output lists a number and the command. The number may be useful if you wish to re-execute that command (see below).
Less typing (sometimes)
The command line uses the history file in some useful ways that you should become familiar with as they can speedup your interaction (and save you some typing).
- The up and down arrows will effectively scroll backward and forward in your history. You will see the different commands show up at the prompt.
!!repeats the last typed command!*n*where n is the number of the command output fromhistory!along with one or a few letters from the start of the command repeats commands other than the last one (i.e., most recent)
As an example, consider this snippet of history:
401 pwd
402 ls
403 python3 simulation.py config.txt
404 cd ../data/output
405 cat outfile.05292022.txt
- Pressing up once will recall the last command
cat outfile.05292022.txt. Pressing up again will change the command tocd ../data/outputThis is very helpful especially when you need to edit a command before executing it !!(and pressingEnter) will executecat outfile.05292022.txt!403(and pressingEnter) will executepython3 simulation.py config.txt!cd(and pressingEnter) will executecd ../data/outputIf you have not typed enough of the command to disambiguate among commands (e.g.,!c) then the first command that matches will execute. In this example that would becat outfile.05292022.txt
Another useful tip not related to history, but one that saves some typing nonetheless, is the use of tab to help with command completion. If you start to type a command (whether you've used it before or not) and press tab (e.g., his then tab) the system will try to autocomplete the command, most likely with history in this case. If there are multiple possible matches (e.g., hi might match history or hipercdecode) then nothing will display. You must press tab a second time and it will list all matching commands. With that information you can then type the rest of the command (or at least a few more letters to be more precise when using tab to autocomplete).